Minimal Markdown for Authors
How to Write and Publish a Book Using Open Source Software
Chastity White Rose
Preface
Hello, I am Chastity White Rose, an author of several books. My best quality work is Chastity’s Chess Chapters.
When I wrote that book, I was looking for a convenient way to place pictures in the book to demonstrate how to play Chess. I tried using LibreOffice because it had worked so well for all of the previous books I published. However, once images were added, I became frustrated with the menus and various settings that I knew nothing about. Writing a bunch of text and saving it was easy enough, but the images were not fitting, and the words were being displaced as I did it. It was the worst formatting experience of my life.
However, my solution was found when I discovered the Markdown Guide. I first discovered this amazing new language called Markdown because I am a hobbyist computer programmer, and I have a lot of code on Github. Github projects use a “readme.md” to display information about the project on almost every repository. I knew that these files displayed images as well as text on GitHub, so I tried to figure out what a “.md” file even was.
As it turns out, Markdown is a markup language that is similar to HTML (Hyper Text Markup Language). The difference is that Markdown is easier to write than HTML. Markdown is easy to convert to other formats, and that is what makes it the perfect tool to use when you are an author and are writing a new book.
Therefore, I have used it for all of my books since I discovered how useful it is. Because Markdown is only a language, it needs to be interpreted or translated by computer software into its final form. Because of my experience using Markdown and reading books about it by other authors, I have learned about extremely useful software to assist me as a writer who often publishes a book or blog posts on WordPress. In this book, I will be covering some of the tools that I use the most.
Introduction
You may wonder what Markdown is and why I would suggest using it. I have 3 main reasons.
- Markdown is easy to write in because it only requires a text editor on any PC. Even plain Windows Notepad can work, but I will be introducing even more advanced tools that let you preview the final result while you are writing.
- By using Markdown, you can save money by avoiding the need to use Microsoft Word and remembering what menu options to click to make text bold, italics, or include images or links in your book. You don’t need a word processor at all unless you need advanced control over formatting. Even then, I will teach you how Libre Office Writer can be used, which is entirely Free and open source. For the non-technical reader, Open Source means it can run on Windows, Mac OS, and Linux (I use Debian Linux personally).
- Markdown is a way to preserve your writing so that no matter what software or computer you have in the future, you will not lose access to your work. If you were to rely on Microsoft Word, then you would find yourself paying a subscription fee for the rest of your life or being unable to open your .docx files. Even then, there is no guarantee that the file won’t become corrupted or stop working whenever a new version of Microsoft Word is installed. Markdown is just plain text with a few formatting marks, and you will always be able to open it using any text editor you have for any device.
Writing in Markdown is so easy that I can explain how to use it with an example:
# Book Title

## Chapter 1

This is the first paragraph of chapter 1.

This is the second paragraph of chapter 1.

This is the third paragraph of chapter 1.

## Chapter 2

This is the first paragraph of chapter 2.

This is the second paragraph of chapter 2.

This is the third paragraph of chapter 2.
If you have that text in a program capable of displaying the converted output, it will look something like this:
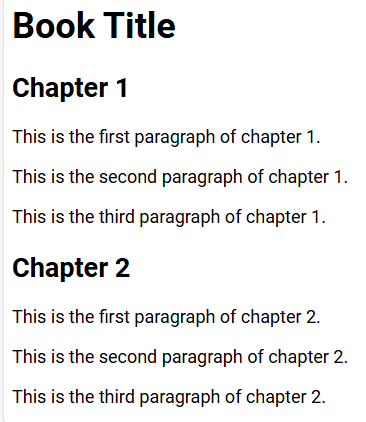
Do you notice how the Book Title is larger than the chapter titles? This automatic sizing works because the single # at the beginning of a line means a level 1 heading. Two of them at the beginning is a level 2 heading. There are 6 levels of headings, from big to small. Defining something as a heading may not seem like much, but it serves two purposes. First, a human reader can know when there is a new chapter or section of a book. Second, if your book is published as an e-book, the software that humans use to read it will automatically know where the headings are and can build an automatic table of contents even if you did not create one. This automatic linking ability means they can click and instantly be taken to the chapter they want to read.
All you had to do was insert a few # signs at the beginning of a line followed by a space. The rest of the text on that line will look different from the smaller body text. Which exact font families and sizes are used depends on the software you are using, but this means that you can customize it! I will explain more about that later!
But Markdown is not limited to defining your chapter headings. It can do a lot more!
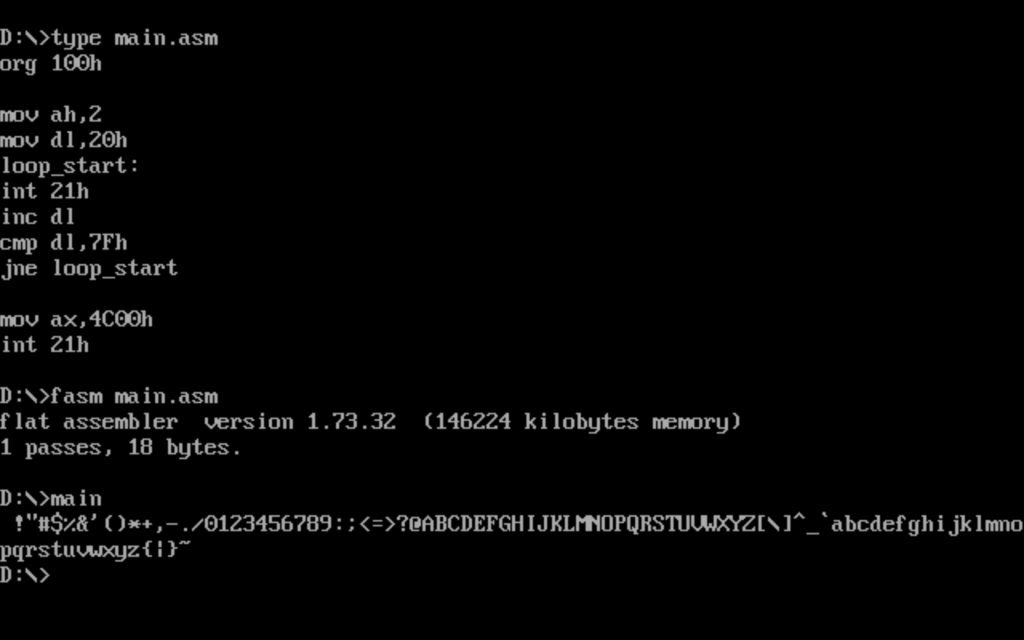
For example, images can be displayed. For example, the following line links to an image of a horse on my blog.
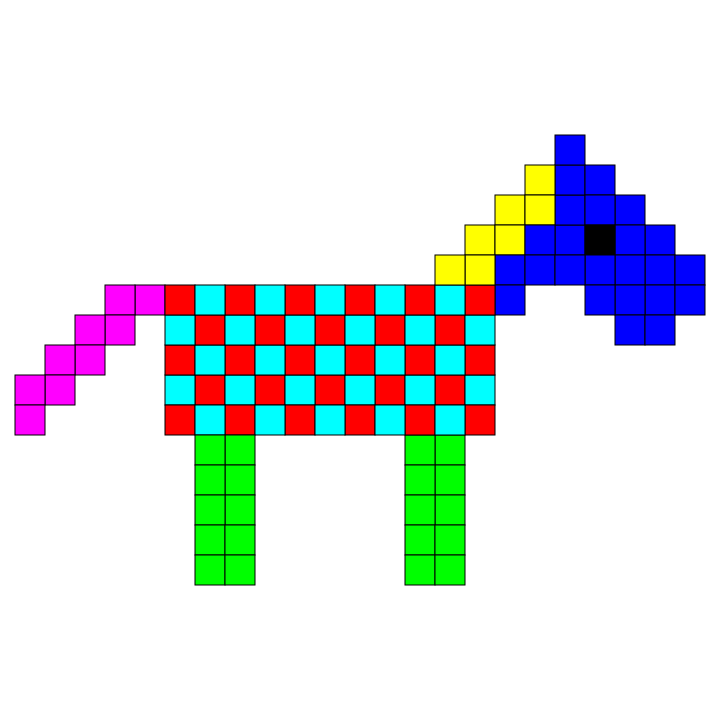

Because this image is hosted somewhere, this horse can be included and displayed in a book, just as can be done on a website with HTML. However, it only works if you are connected to the internet at the time (unless the images are embedded into a book file, as can be done with Pandoc)
It is also possible to make a clickable link within a book. Note that this only applies to e-books because, in a paperback, everything is paper and ink, not an electronic device.
For example, the following is a link:
https://chastitychesschallenge.com/
But the following is also a link:
chastitywhiterose.com
The Markdown code to include the links above is:
<https://chastitychesschallenge.com/>

[chastitywhiterose.com](https://chastitywhiterose.com/)
Notice that the first one, which is already in URL form, is simply enclosed in greater and less than signs. The second has the URL in parenthesis, but the text that will be displayed is in square brackets. Both of these things work fine, but the second form allows the link text to be whatever you want it to be.
You can also make text look:
- italic
- bold
- both italic and bold at the same time!
The Markdown code to do this looks like this:
You can also make text look:

- *italic*
- **bold**
- ***both italic and bold at the same time!***
It all depends on whether you include 1, 2, or 3 * characters surrounding the text you want to modify.
So far, we have seen that you can define which text is your headings, make clickable links, display images, and even set bold or italics however you want.
But that is just the beginning of what you can do. I will be sharing with you the tools that I use when writing and converting my Markdown text into different formats for publishing books to Amazon and Draft2Digital.
My job is to teach you the methods you can use to get your book properly formatted on your computer so that you can either sell it, give it away, or turn it into a website if that is what you wish! I have been writing and publishing books since 2013, and over time, I have become better as a writer but also better as a computer user in general.
If you are a person who wants to write a book, it is still your job to write it in a way your readers understand and make it worth their time to read. However, if you follow my instructions, your book will look correct, and they will see where chapters begin, your regular, italic, or bold text, and your pictures if you choose to include any.
This book will contain pictures because I am providing instructions on how to use software to achieve goals for publishing.
Chapter 1: Writing tools
There are literally hundreds of tools for writing Markdown than you can imagine! For this book, I will be limiting it to my top 3 favorites!
All 3 of those apps are useful for their ability to preview the output of what the source Markdown code will look like. For a PC with Windows, Mac, or Linux, Ghostwriter is especially helpful because it works directly with plain text files on your system, just like Notepad does. It also allows a preview, just like Joplin and Simplenote do. For Mobile devices, Joplin and Simplenote are the best.
Ghostwriter
I started using Ghostwriter because it works on Linux. However, it works the same on Windows or Mac operating systems. If you are writing a book for publishing, this is the number one that I recommend and is the tool I used to write this whole book. Let me show you why I love it so much by showing you some pictures!
Dark Mode

Light Mode
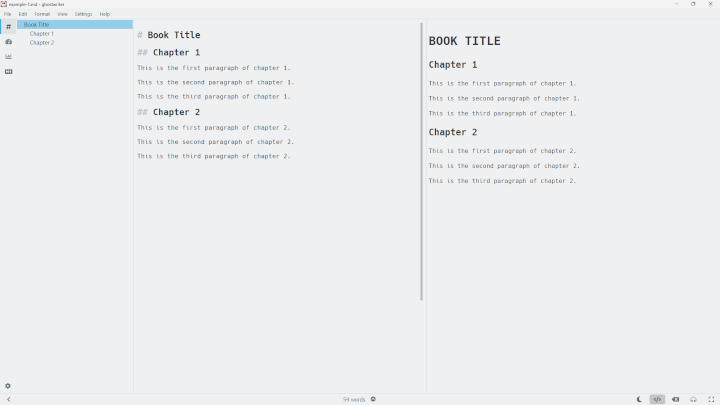
Besides the dark and light modes, the program does allow you to define customized themes. I have not personally explored this option because I am quite satisfied with the default dark mode.
In both of the images above, you see three panels. The middle is the text you are writing. The right is the preview of what it might look like on a website or a book (subject to formatting, which I will cover in a later chapter). The left is a navigation panel that allows you to jump to the specific heading you want. If you are writing a long book, you might want to jump to chapter 9, for example, where you were writing last time, for example.
Ghostwriter is pretty good. It is not the only program of its type, but it certainly has gotten the job done for several of the books that I have published and republished.
If you only use Windows and don’t care about Open Source, you might also like Markdown Monster, which is very similar to Ghostwriter.
Joplin
The next tool that I recommend is Joplin. If you look at the screenshot below, you will see that it is similar to Ghostwriter. However, Joplin’s file system is separate from the rest of your PC. This system allows you to organize your notes into folders called “notebooks”. They can also be searched to find what you are looking for.

From the perspective of PC, Joplin is about the same in terms of quality as Ghostwriter or Markdown Monster. However, the main reason I recommend it is because it also functions as a mobile app.

It is even possible to set up a system for automatically syncing between your PC and phone by using an online server. I actually use a private Nextcloud server to sync my PC, iPhone, and Android phone so that no matter what device I use to take notes on, it will show up on the other devices. However, this ability to customize is more advanced, and you will want to read the Joplin documentation, which is included in the app and on the official Joplin website.
Another feature that is unique among Markdown editors is that it has the option to attach images from either the PC or Mobile app and then have them displayed in Joplin. When you do this, then that file becomes part of the data that Joplin stores. The attachment feature of Joplin could be especially useful if someone was taking a lot of pictures with their iPhone camera and wanted to write about each of them and make a small book of a portfolio or photo album.
If you are always on the go, Joplin might be for you. Also, it does not require creating an account unless you need syncing capability. Therefore, if you want a way to organize your notes into folders and don’t have a reliable internet connection on your phone, then Joplin is pretty good as far as mobile apps go.
If you use a PC and don’t use your phone as a writing tool, you can probably just stick with Ghostwriter, as mentioned in the previous section.
Simplenote
Simplenote is another Markdown editor that has desktop and mobile apps. However, it works a little bit differently in that you create an account with your email address, and then you can get a login code sent to your email to sign in.
If syncing between devices is a primary concern for you, I have to recommend Simplenote because accessing your data on any device where you are signed in is trivial. Simplenote really is simple. It does not have all the fancy features of the other two programs I have recommended above, but because it doesn’t contain much, it is also easy to use without getting lost in the interface.
Of course, the primary purpose of Simplenote is to write down your notes quickly on the go. Later, when you want to collect them into a book, you will still want to copy and paste the text into Ghostwriter or Joplin on a PC, so you can make use of the exporting features of these to archive and send them to publishers or your friends.
I use Simplenote all the time whenever I have an idea that I need to write down on my phone and then later finish it on my PC before I post it to my blog or email it to someone. The most recent notes you have written are always at the top, so you can go through them and then do what you need to before deleting them after you no longer need those notes.
I haven’t included a picture of it because it really isn’t that fancy. It also does not show you the Markdown preview while writing. You have to click a button to see it, but it does have Markdown support. However, to be able to include images in your notes, they have to be stored somewhere on the internet. Therefore, I would recommend storing images on a website where you can link to them. Fun fact: all of the pictures in my Chess book, Chastity’s Chess Chapters, were stored on my WordPress blog about my Chess teaching business.
Other Editors
It is not that important that you use one of the 3 programs I have recommended in this chapter. A plain old text editor will do just fine, but you will not have the ability to preview the result.
You can also use an online Markdown editor.
The reason I mention WordPress as an online Markdown editor (even though it does a whole lot more) is because it has full support for Markdown via its Markdown block type, which allows you to paste your text into it and preview the result even before you post. In fact, all of my blog posts have been written in Markdown since the beginning of 2025. When making a new post, you can type / and then select the Markdown block from the dropdown menu.